This is an old revision of the document!
Table of Contents
Especificaciones
Xarxa
LACP
tplink TL-SG1024DE
https://www.tp-link.com/es/support/faq/991/?utm_medium=select-local
La IP del switch es 192.168.0.1. Nos ponemos un ip de ese rango (por ejemplo 192.168.0.2) y accedemos vía web:
admin/admin
Para configurar LACP vamos a System / switching / Port Trunk
ILO
| Server | Server 1 (docker) | Server 2 (nas) | Server 3 | Server 4 (proxmox) |
|---|---|---|---|---|
| ILO | 192.168.1.21 | 192.168.1.22 | 192.168.1.23 | 192.168.1.24 |
| ILO | ippública:8081 | ippública:8082 | ippública:8083 | ippública:8084 |
| ILO | d0:bf:9c:45:dd:7e | d0:bf:9c:45:d8:b6 | d0:bf:9c:45:d4:ae | d0:bf:9c:45:d7:ce |
| ETH1 | d0:bf:9c:45:dd:7c OK | d0:bf:9c:45:d8:b4 | d0:bf:9c:45:d4:ac OK | d0:bf:9c:45:d7:cc ok |
| ETH2 | d0:bf:9c:45:dd:7d | d0:bf:9c:45:d8:b5 ok | d0:bf:9c:45:d4:ad | d0:bf:9c:45:d7:cd |
| RAM | 10GB (8+2) | 4Gb (2+2) | 16Gb (8+8) | 10Gb (8+2) |
| DISCO | 480Gb + 480Gb | 4x8TB | 480Gb + 480Gb | 1,8Tb + 3Gb |
| IP | 192.168.1.200 | 192.168.1.250 | 192.168.1.32 | 192.168.1.33 |
Usuario ILO ruth/C9
Configurar ILO
Al arrancar pulsar F8 (Ilo 4 Advanced press [F8] to configure)
Actualizar ILO
Descargar:
http://www.hpe.com/support/ilo4
Si es un exe, descomprimir y coger el bin. Se sube en la web de la ILO: overview / iLO Firmware Version
Agente ILO
Para ver mas info en la ILO como el disco duro, añadir a sources:
deb http://downloads.linux.hpe.com/SDR/repo/mcp stretch/current-gen9 non-free
apt-key adv --keyserver keyserver.ubuntu.com --recv-keys C208ADDE26C2B797
apt-get install hp-ams
BIOS
Tiene que tener instalado hp-ams para que detecte la ILO.
Yo lo he hecho con debian. Descargamos el software rpm de i386
Lo convertimos a deb. Lo instalamos:
dpkg --add-architecture i386
dpkg -i firmware-system-j06_2019.04.04-2.1_i386.deb
cd /usr/lib/i386-linux-gnu/firmware-system-j06-2019.04.04-1.1/
./hpsetup
Flash Engine Version: Linux-1.5.9.5-2

Name: Online ROM Flash Component for Linux - HP ProLiant MicroServer Gen8 (J06) Servers
New Version: 04/04/2019

Current Version: 06/06/2014

The software is installed but is not up to date.

Do you want to upgrade the software to a newer version (y/n) ?y

Flash in progress do not interrupt or your system may become unusable.
Working........................................................
The installation procedure completed successfully.

A reboot is required to finish the installation completely.
Do you want to reboot your system now? yes
NAS
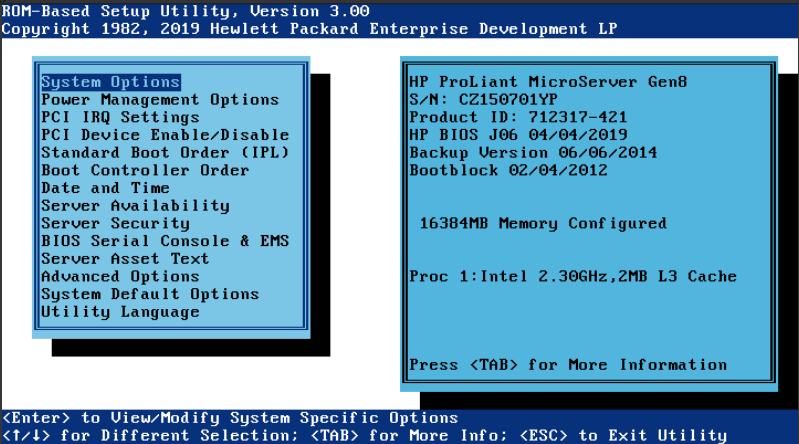
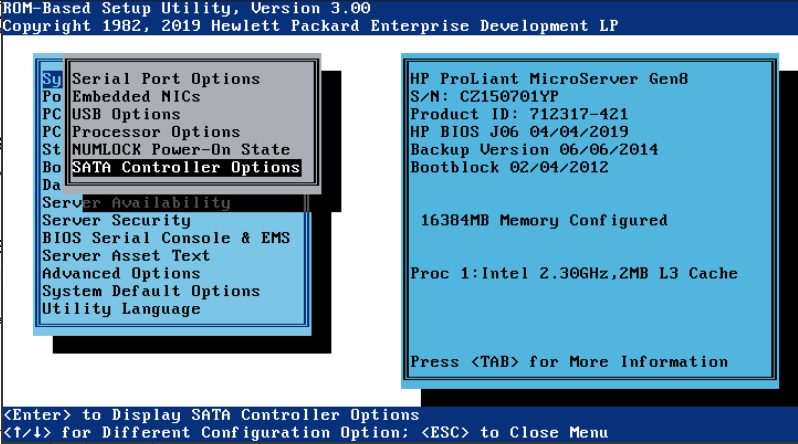
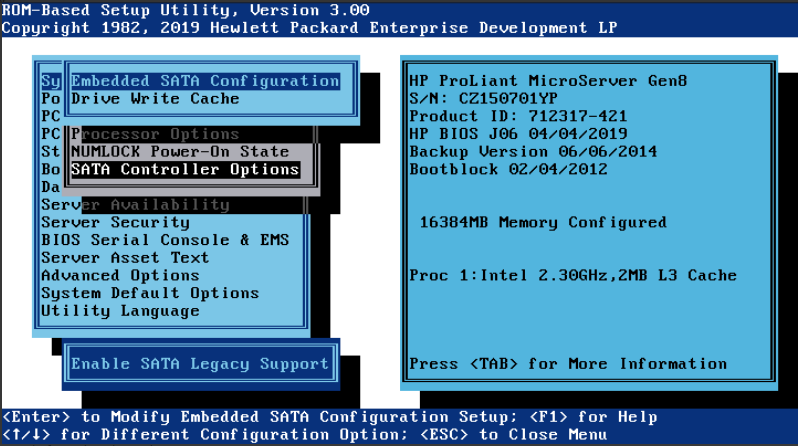
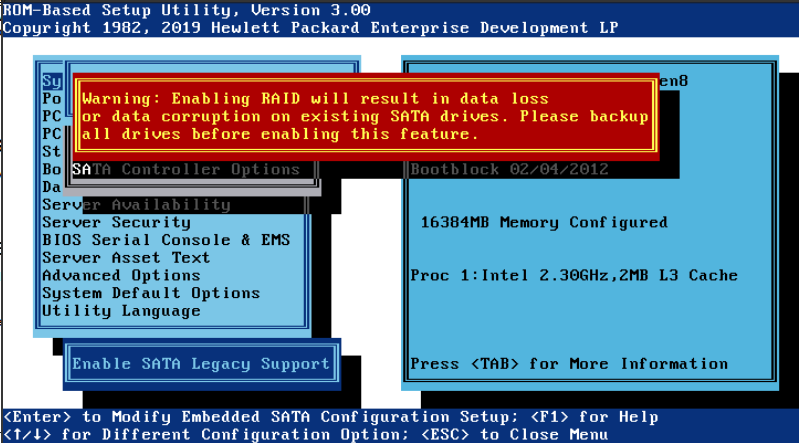
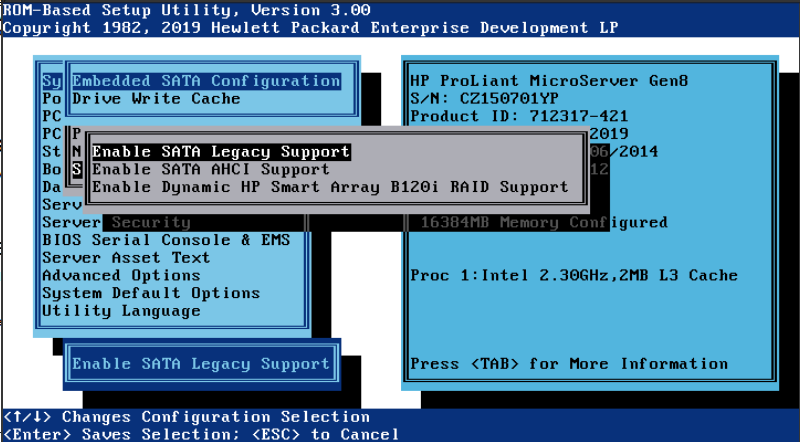
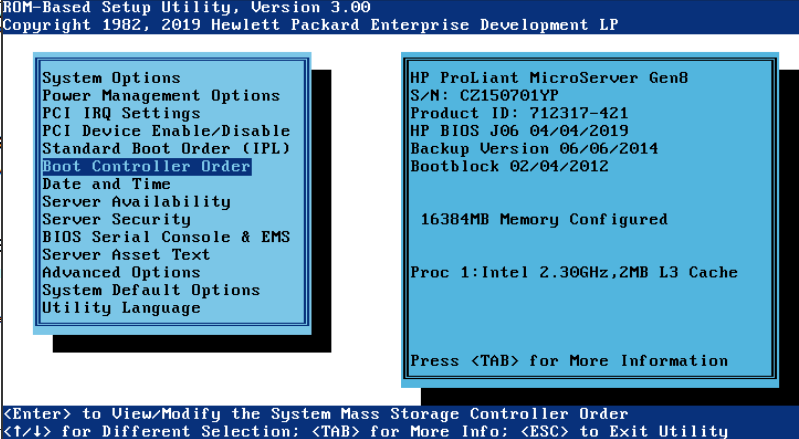
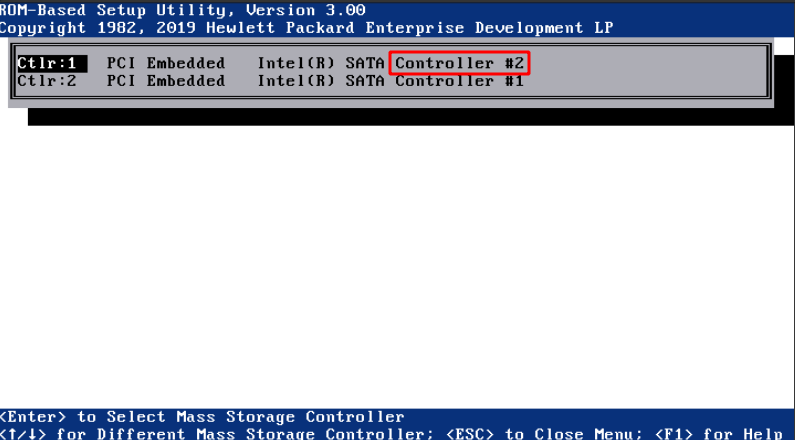
Para que arranque del SSD puesto en el CDROM hay que cambiar en la BIOS:
Pulsar F9 para etrar en BIOS
Cambiar a modo Legacy y el controller el 2, que es el CDROM en vez de los 4 discos
Configuración del RAID
blkid
/dev/md0: UUID="955edf36-f785-441e-95e6-ff7cd77fc510" TYPE="ext4"
/dev/sda1: UUID="ba93d654-1e00-4b85-b2f1-f9930af9cc43" UUID_SUB="f61e84e9-271d-a311-9ae4-6eca19a84c10" LABEL="nas:0" TYPE="linux_raid_member" PARTUUID="b638f829-b354-4953-9e08-f96c8f4f031d"
/dev/sdb1: UUID="ba93d654-1e00-4b85-b2f1-f9930af9cc43" UUID_SUB="6984a8d2-694a-b00b-0f23-809b2c123924" LABEL="nas:0" TYPE="linux_raid_member" PARTUUID="c9f7459b-cef8-434c-8a41-a471989eee60"
/dev/sdc1: UUID="ba93d654-1e00-4b85-b2f1-f9930af9cc43" UUID_SUB="12d795a6-a34e-feec-4c8f-6ad962a59536" LABEL="nas:0" TYPE="linux_raid_member" PARTUUID="eebd20a6-6f32-46a9-9015-adc50649514a"
/dev/sde1: UUID="a7edb0b3-d69b-43da-9dc6-66d046c4e344" TYPE="ext4" PARTUUID="c3c3e823-01"
/dev/sde5: UUID="b5c2a2a5-7217-4ab0-bdd9-55469ddcfaf9" TYPE="swap" PARTUUID="c3c3e823-05"
/dev/sdd1: UUID="ba93d654-1e00-4b85-b2f1-f9930af9cc43" UUID_SUB="cfd1a1fd-d4c7-a1f8-0779-c235b8784b5b" LABEL="nas:0" TYPE="linux_raid_member" PARTUUID="ca58c1f5-abc7-4b18-b5ae-f738788cb1ea"
/dev/sdf1: PARTUUID="0e2b0ddc-a8e9-11e9-a82e-d0bf9c45d8b4"
/dev/sdf2: LABEL="freenas-boot" UUID="15348038225366585637" UUID_SUB="12889063831144199016" TYPE="zfs_member" PARTUUID="0e4dff28-a8e9-11e9-a82e-d0bf9c45d8b4"
Ponemos en /etc/fstab
UUID=955edf36-f785-441e-95e6-ff7cd77fc510 /mnt/raid ext4 defaults 0 2
Desde 192.168.1.32
showmount -e 192.168.1.250
Export list for 192.168.1.250:
/mnt/dades/media 192.168.1.0
Montamos el recurso:
mkdir /nfs
mount 192.168.1.250:/mnt/dades/media /nfs
root@nas:/mnt/raid# apt-get install nfs-kernel-server
root@nas:/mnt/raid# cat /etc/exports /mnt/raid/nfs 192.168.1.0/255.255.255.0(rw,async,subtree_check,no_root_squash)
Reiniciamos el servicio root@nas:/mnt/raid# exportfs -rav exporting 192.168.1.0/255.255.255.0:/mnt/raid/nfs
En el cliente instalamos nfs: apt-get install nfs-common
Mostramos si lo ve root@avtp239:~# showmount -e 192.168.1.250 Export list for 192.168.1.250: /mnt/raid/nfs 192.168.1.0/255.255.255.0
Lo montamos root@avtp239:/mnt# mount -t nfs 192.168.1.250:/mnt/raid/nfs /mnt/nfs
Wake on lan (wakeonlan)
F9
Server Avalilability
Wake-On Lan
server 3
Para levantar un servidor, instalar el paquete wakeonlan y ejecutar con la mac de eth1:
wakeonlan <MAC>
Por ekemplo:
wakeonlan d0:bf:9c:45:dd:7c
Kubernetes
Instalar docker y cambiar driver cgroups
https://kubernetes.io/docs/setup/production-environment/container-runtimes/
https://kubernetes.io/docs/setup/production-environment/tools/kubeadm/install-kubeadm/
apt-get update && apt-get install -y apt-transport-https curl
curl -s https://packages.cloud.google.com/apt/doc/apt-key.gpg | apt-key add -
cat <<EOF >/etc/apt/sources.list.d/kubernetes.list
deb https://apt.kubernetes.io/ kubernetes-xenial main
EOF
apt-get update
apt-get install -y kubelet kubeadm kubectl
apt-mark hold kubelet kubeadm kubectl
root@kubernetes2:~# swapoff  -a
root@kubernetes2:~# kubeadm init
[init] Using Kubernetes version: v1.15.1
[preflight] Running pre-flight checks
	[WARNING IsDockerSystemdCheck]: detected "cgroupfs" as the Docker cgroup driver. The recommended driver is "systemd". Please follow the guide at https://kubernetes.io/docs/setup/cri/
[preflight] Pulling images required for setting up a Kubernetes cluster
[preflight] This might take a minute or two, depending on the speed of your internet connection
[preflight] You can also perform this action in beforehand using 'kubeadm config images pull'

[kubelet-start] Writing kubelet environment file with flags to file "/var/lib/kubelet/kubeadm-flags.env"
[kubelet-start] Writing kubelet configuration to file "/var/lib/kubelet/config.yaml"
[kubelet-start] Activating the kubelet service
[certs] Using certificateDir folder "/etc/kubernetes/pki"
[certs] Generating "ca" certificate and key
[certs] Generating "apiserver" certificate and key
[certs] apiserver serving cert is signed for DNS names [kubernetes2 kubernetes kubernetes.default kubernetes.default.svc kubernetes.default.svc.cluster.local] and IPs [10.96.0.1 192.168.1.32]
[certs] Generating "apiserver-kubelet-client" certificate and key
[certs] Generating "etcd/ca" certificate and key
[certs] Generating "apiserver-etcd-client" certificate and key
[certs] Generating "etcd/server" certificate and key
[certs] etcd/server serving cert is signed for DNS names [kubernetes2 localhost] and IPs [192.168.1.32 127.0.0.1 ::1]
[certs] Generating "etcd/peer" certificate and key
[certs] etcd/peer serving cert is signed for DNS names [kubernetes2 localhost] and IPs [192.168.1.32 127.0.0.1 ::1]
[certs] Generating "etcd/healthcheck-client" certificate and key
[certs] Generating "front-proxy-ca" certificate and key
[certs] Generating "front-proxy-client" certificate and key
[certs] Generating "sa" key and public key
[kubeconfig] Using kubeconfig folder "/etc/kubernetes"
[kubeconfig] Writing "admin.conf" kubeconfig file
[kubeconfig] Writing "kubelet.conf" kubeconfig file
[kubeconfig] Writing "controller-manager.conf" kubeconfig file
[kubeconfig] Writing "scheduler.conf" kubeconfig file
[control-plane] Using manifest folder "/etc/kubernetes/manifests"
[control-plane] Creating static Pod manifest for "kube-apiserver"
[control-plane] Creating static Pod manifest for "kube-controller-manager"
[control-plane] Creating static Pod manifest for "kube-scheduler"
[etcd] Creating static Pod manifest for local etcd in "/etc/kubernetes/manifests"
[wait-control-plane] Waiting for the kubelet to boot up the control plane as static Pods from directory "/etc/kubernetes/manifests". This can take up to 4m0s
[apiclient] All control plane components are healthy after 37.503359 seconds
[upload-config] Storing the configuration used in ConfigMap "kubeadm-config" in the "kube-system" Namespace
[kubelet] Creating a ConfigMap "kubelet-config-1.15" in namespace kube-system with the configuration for the kubelets in the cluster
[upload-certs] Skipping phase. Please see --upload-certs
[mark-control-plane] Marking the node kubernetes2 as control-plane by adding the label "node-role.kubernetes.io/master=''"
[mark-control-plane] Marking the node kubernetes2 as control-plane by adding the taints [node-role.kubernetes.io/master:NoSchedule]
[bootstrap-token] Using token: 5h71z5.tasjr0w0bvtauxpb
[bootstrap-token] Configuring bootstrap tokens, cluster-info ConfigMap, RBAC Roles
[bootstrap-token] configured RBAC rules to allow Node Bootstrap tokens to post CSRs in order for nodes to get long term certificate credentials
[bootstrap-token] configured RBAC rules to allow the csrapprover controller automatically approve CSRs from a Node Bootstrap Token
[bootstrap-token] configured RBAC rules to allow certificate rotation for all node client certificates in the cluster
[bootstrap-token] Creating the "cluster-info" ConfigMap in the "kube-public" namespace
[addons] Applied essential addon: CoreDNS
[addons] Applied essential addon: kube-proxy

Your Kubernetes control-plane has initialized successfully!

To start using your cluster, you need to run the following as a regular user:

  mkdir -p $HOME/.kube
  sudo cp -i /etc/kubernetes/admin.conf $HOME/.kube/config
  sudo chown $(id -u):$(id -g) $HOME/.kube/config

You should now deploy a pod network to the cluster.
Run "kubectl apply -f [podnetwork].yaml" with one of the options listed at:
  https://kubernetes.io/docs/concepts/cluster-administration/addons/

Then you can join any number of worker nodes by running the following on each as root:

kubeadm join 192.168.1.32:6443 --token 5h71z5.tasjr0w0bvtauxpb \
    --discovery-token-ca-cert-hash sha256:7d1ce467bfeb50df0023d439ef00b9597c3a140f5aa77ed089f7ee3fbee0d232
root@kubernetes2:~#
root@kubernetes2:~#
Desplegar una app:
https://kubernetes.io/docs/tutorials/kubernetes-basics/deploy-app/deploy-intro/
ruth@kubernetes2:~$ kubectl create deployment hello-node --image=gcr.io/hello-minikube-zero-install/hello-node
deployment.apps/hello-node created
ruth@kubernetes2:~$ kubectl get deployments
NAME         READY   UP-TO-DATE   AVAILABLE   AGE
hello-node   0/1     1            0           10s


ruth@kubernetes2:~$ kubectl get pods
NAME                          READY   STATUS    RESTARTS   AGE
hello-node-55b49fb9f8-fw2nh   1/1     Running   0          51s


ruth@kubernetes2:~$ kubectl get events
LAST SEEN   TYPE     REASON              OBJECT                             MESSAGE
73s         Normal   Scheduled           pod/hello-node-55b49fb9f8-fw2nh    Successfully assigned default/hello-node-55b49fb9f8-fw2nh to kubernetes3
72s         Normal   Pulling             pod/hello-node-55b49fb9f8-fw2nh    Pulling image "gcr.io/hello-minikube-zero-install/hello-node"
38s         Normal   Pulled              pod/hello-node-55b49fb9f8-fw2nh    Successfully pulled image "gcr.io/hello-minikube-zero-install/hello-node"
29s         Normal   Created             pod/hello-node-55b49fb9f8-fw2nh    Created container hello-node
29s         Normal   Started             pod/hello-node-55b49fb9f8-fw2nh    Started container hello-node
73s         Normal   SuccessfulCreate    replicaset/hello-node-55b49fb9f8   Created pod: hello-node-55b49fb9f8-fw2nh
73s         Normal   ScalingReplicaSet   deployment/hello-node              Scaled up replica set hello-node-55b49fb9f8 to 1

ruth@kubernetes2:~$ kubectl config view
apiVersion: v1
clusters:
- cluster:
    certificate-authority-data: DATA+OMITTED
    server: https://192.168.1.32:6443
  name: kubernetes
contexts:
- context:
    cluster: kubernetes
    user: kubernetes-admin
  name: kubernetes-admin@kubernetes
current-context: kubernetes-admin@kubernetes
kind: Config
preferences: {}
users:
- name: kubernetes-admin
  user:
    client-certificate-data: REDACTED
    client-key-data: REDACTED
Creamos un servicio:
ruth@kubernetes2:~$ kubectl expose deployment hello-node --type=LoadBalancer --port=8080
service/hello-node exposed
ruth@kubernetes2:~$ kubectl get services
NAME         TYPE           CLUSTER-IP     EXTERNAL-IP   PORT(S)          AGE
hello-node   LoadBalancer   10.99.215.55   <pending>     8080:32151/TCP   11s
kubernetes   ClusterIP      10.96.0.1      <none>        443/TCP          16h
Para borrarlo:
kubectl delete service hello-node
kubectl delete deployment hello-node

