Table of Contents
Invernadero
Arduino Mega y raspberry 4
Arduino
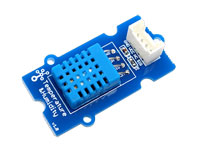
Sensor de temperatura digital DHT11
Nos tenemos que descargar dos paquetes de bibliotecas (que no librerías) de adafruit de DHT
https://github.com/adafruit/DHT-sensor-library
Nos bajamos también las de Adafruit_Sensor y las copiamos en el mismo directorio:
https://github.com/adafruit/Adafruit_Sensor
Lo copiamos en:
/usr/share/arduino/libraries/DHT
He tenido que modificar un fichero porque me daba este error:
/usr/share/arduino/libraries/DHT/DHT.cpp: In member function ‘bool DHT::read(bool)’:
/usr/share/arduino/libraries/DHT/DHT.cpp:30:3: error: ‘UINT32_MAX’ was not declared in this scope
   UINT32_MAX /**< Used programmatically for timeout.                           \
   ^
Enlace con la solución:
https://forums.adafruit.com/viewtopic.php?f=25&p=847615
He añadido la línea:
#define UINT32_MAX 0xffffffff
Casi al principio del fichero:
/usr/share/arduino/libraries/DHT/DHT.cpp
Queda así:
#include "DHT.h"

#define UINT32_MAX 0xffffffff
#define MIN_INTERVAL 2000 /**< min interval value */
#define TIMEOUT
En el código descomentamos DHT11 que es nuestro modelo. Está puesto el pin digital 2: #define DHTPIN 2
Queda asi
// Example testing sketch for various DHT humidity/temperature sensors
// Written by ladyada, public domain

#include "DHT.h"

#define DHTPIN 2     // what digital pin we're connected to

// Uncomment whatever type you're using!
#define DHTTYPE DHT11   // DHT 11
//#define DHTTYPE DHT22   // DHT 22  (AM2302), AM2321
//#define DHTTYPE DHT21   // DHT 21 (AM2301)

// Connect pin 1 (on the left) of the sensor to +5V
// NOTE: If using a board with 3.3V logic like an Arduino Due connect pin 1
// to 3.3V instead of 5V!
// Connect pin 2 of the sensor to whatever your DHTPIN is
// Connect pin 4 (on the right) of the sensor to GROUND
// Connect a 10K resistor from pin 2 (data) to pin 1 (power) of the sensor

// Initialize DHT sensor.
// Note that older versions of this library took an optional third parameter to
// tweak the timings for faster processors.  This parameter is no longer needed
// as the current DHT reading algorithm adjusts itself to work on faster procs.
DHT dht(DHTPIN, DHTTYPE);

void setup() {
  Serial.begin(9600);
  Serial.println("DHTxx test!");

  dht.begin();
}

void loop() {
  // Wait a few seconds between measurements.
  delay(2000);

  // Reading temperature or humidity takes about 250 milliseconds!
  // Sensor readings may also be up to 2 seconds 'old' (its a very slow sensor)
  float h = dht.readHumidity();
  // Read temperature as Celsius (the default)
  float t = dht.readTemperature();
  // Read temperature as Fahrenheit (isFahrenheit = true)
  float f = dht.readTemperature(true);

  // Check if any reads failed and exit early (to try again).
  if (isnan(h) || isnan(t) || isnan(f)) {
    Serial.println("Failed to read from DHT sensor!");
    return;
  }

  // Compute heat index in Fahrenheit (the default)
  float hif = dht.computeHeatIndex(f, h);
  // Compute heat index in Celsius (isFahreheit = false)
  float hic = dht.computeHeatIndex(t, h, false);

  Serial.print("Humidity: ");
  Serial.print(h);
  Serial.print(" %\t");
  Serial.print("Temperature: ");
  Serial.print(t);
  Serial.print(" *C ");
  Serial.print(f);
  Serial.print(" *F\t");
  Serial.print("Heat index: ");
  Serial.print(hic);
  Serial.print(" *C ");
  Serial.print(hif);
  Serial.println(" *F");
}
La conexión es:
| SENSOR | Arduino |
|---|---|
| Cable Negro (GND) | GND |
| Cable Rojo (VCC) | 5V |
| Cable Blanco (NV) | SIN CONEXIÓN |
| Cable Amarillo (SIG) | PIN 2 |
En Tools > Board seleccionamos:
Arduino Mega 2560
Seleccionamos también Tools > Serial Port
Pulsamos el botón de compilar y el de upload.
Si va bien, abrimos la ventana para ver los resultados, Tools > Serial Monitor (o Ctrl+Shit+M)
Nos tiene que salir algo así:
Temperature: 22.00°C
Humidity: 36.00%
Modifico el script para que tenga una salida en una línea del tipo:
36.00 22.00
Código de Arduino
#include "DHT.h"

#define DHTPIN 2     // what digital pin we're connected to

#define DHTTYPE DHT11   // DHT 11
DHT dht(DHTPIN, DHTTYPE);

void setup() {
  Serial.begin(9600);
  dht.begin();
}

void loop() {
  delay(2000);

  // Reading temperature or humidity takes about 250 milliseconds!
  // Sensor readings may also be up to 2 seconds 'old' (its a very slow sensor)
  float h = dht.readHumidity();
  // Read temperature as Celsius (the default)
  float t = dht.readTemperature();
  // Read temperature as Fahrenheit (isFahrenheit = true)
  float f = dht.readTemperature(true);

  // Check if any reads failed and exit early (to try again).
  if (isnan(h) || isnan(t) || isnan(f)) {
    Serial.println("Failed to read from DHT sensor!");
    return;
  }

  // Compute heat index in Fahrenheit (the default)
  float hif = dht.computeHeatIndex(f, h);
  // Compute heat index in Celsius (isFahreheit = false)
  float hic = dht.computeHeatIndex(t, h, false);

  Serial.print(h);
  Serial.print(" ");
  Serial.println(t);
}
Conecto arduino a la raspberry por usb y le pongo este código. Escribe en el fichero lecturas.txt una línea con la fecha, humedad y temperatura:
03/02/2021 23:30:04 43.00 13.00
Código de fichero leer.py
import serial
import time
from time import localtime, strftime

ser = serial.Serial('/dev/ttyACM0', 9600)

f = open("lecturas.txt","a")
x=ser.readline().split()
print x[0]
print x[1]
f.write(strftime("%d/%m/%Y %H:%M:%S ", localtime()))
f.write(x[0])
f.write(" ")
f.write(x[1])
f.write("\n")
f.close()
Pongo en el crontab:
- /10 * * * * python /root/leer.py
Sensor humedad tierra
Sensor YL-38 y YL-69
https://www.taloselectronics.com/products/sensor-de-humedad-del-suelo-yl38-y-yl69
Dimensiones YL-38: 30 x 16 mm
Dimensiones YL-69: 60 x 30 mm
Leémos el pin analógico y normalizamos el valor de 0-1024 a 0-100
void setup() {
  // initialize serial communication at 9600 bits per second:
  Serial.begin(9600);
}


void loop() {
  // read the input on analog pin 0:
  int sensorValue = analogRead(A0);
  int humedad = map(sensorValue, 0,1023,100,0);

  Serial.println(humedad);
  delay(5000);
}
Cámara
Con la integrada:
Tomar foto
raspistill -o foto.jpg
Grabar vídeo
raspivid -o Desktop/video.h264
Camara HP por USB:
La cámara HP es 1280×720. -i es input, 0 es /dev/video0
fswebcam -i 0 -r 1280x720 --jpeg 85 -D 1 fswebcam.jpg
Para la cámara genérica he instalado guvcview y reiniciado. La resolución es de 640×480
Cámara amazon
streamer -f jpeg -o nueva_streamer_01.jpeg
Resolución 1280×960
Orange PI
Hacemos nmap
Nmap scan report for OrangePi.home (192.168.1.133)
Host is up (0.0048s latency).
MAC Address: 02:42:A2:2B:D6:90 (Unknown)
Usuario: root/orangepi
Configuración wifi. Añadimos este fichero y reiniciamos:
/etc/network/interfaces.d/wlan0
auto wlan0
iface wlan0 inet dhcp
wpa-ssid <mi red wifi>
wpa-psk ************
Camara USB HP
lsusb
Bus 003 Device 002: ID 03f0:a707 HP, Inc
Funciona en la raspberry
fswebcam -r 1280x720 --jpeg 85 -D 1 fswebcam.jpg
streamer -f jpeg -o image.jpeg
Grafana
Creamos BBDD en influx
curl -i -XPOST http://172.17.0.1:8087/query --data-urlencode "q=CREATE DATABASE invernadero"
Si quisieramos borar la BBDD:
curl -i -XPOST http://172.17.0.1:8087/query --data-urlencode "q=DROP DATABASE invernadero"
Para meter datos:
curl -i -XPOST 'http://172.17.0.1:8087/write?db=invernadero&precision=s' --data-binary @todos.txt
El fichero todos.txt tiene este formato:
invernadero,sensor=interior humedad=83.00,temperatura=12.00 1612428604
invernadero,sensor=interior humedad=83.00,temperatura=12.00 1612429204
invernadero,sensor=interior humedad=82.00,temperatura=12.00 1612429804
invernadero,sensor=interior humedad=80.00,temperatura=14.00 1612430404
invernadero,sensor=interior humedad=75.00,temperatura=15.00 1612431004
invernadero,sensor=interior humedad=73.00,temperatura=14.00 1612431604
invernadero,sensor=interior humedad=73.00,temperatura=13.00 1612432205
invernadero,sensor=interior humedad=73.00,temperatura=14.00 1612432804
Podemos consultarlos:
curl -i -XPOST http://172.17.0.1:8087/query --data-urlencode "db=invernadero" --data-urlencode "q=SELECT * FROM invernadero"
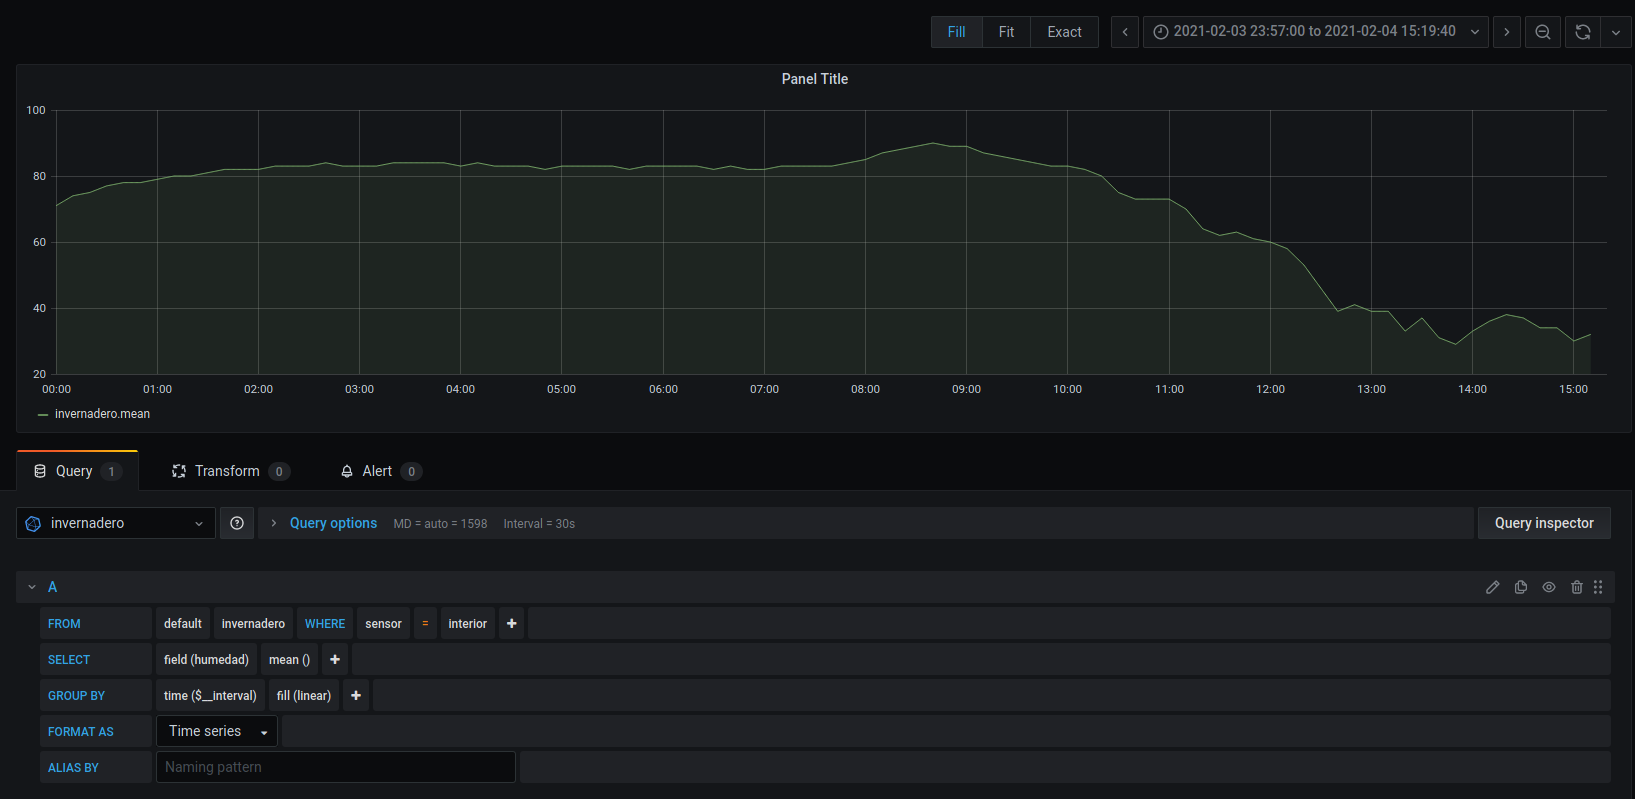
La gráfica la creamos así. Para que se rellene tenemos que poner en GROUP BY fill(linear)

